24th Nov 2022
Laying Bathroom Vinyl Flooring in NZ: Complete Step-By-Step Guide
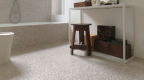
Finding the right flooring for your bathroom takes the perfect balance between function and style. Your bathroom flooring needs to be appropriate for wet areas and give the look you’re after. At Tile Space, we have the inspiration you need for every flooring option.
Is vinyl a good choice for a bathroom floor? Vinyl planks are waterproof and stain resistant, making them a fantastic option for bathroom floors. At Tile Space, our range of SPC luxury vinyl flooring in New Zealand brings woody textures and sophistication with easy installation.
.
What is the easiest bathroom floor to install?
Our click-lock vinyl flooring, available at all Tile Space stores, is extremely easy to install as it does not require any adhesive and can be shifted in the case of mistakes. Planks are locked together by a deep ridge system along each edge, keeping them firmly in place. Our wood look vinyl Aspen tiles are all designed for click-lock installation.
.
Which is better for the bathroom floor, laminate or vinyl?
Vinyl is the best suited to bathroom floors, and here’s why:
- Vinyl is waterproof while laminate is only water resistant. The wood composite material of laminate flooring makes it vulnerable to taking in moisture.
- Vinyl is stronger and more durable in high-traffic areas. SPC vinyl is made of stone plastic composite, which is hard-wearing and easy to maintain.
.
Which is better, tile or vinyl flooring?
Vinyl flooring is particularly durable and easy to maintain. Vinyl doesn’t chip as porcelain tiles may over time. This makes it a great solution for bathrooms in busy homes where objects can drop onto tiles.
Laying vinyl tiles in bathroom spaces is also cheaper and easier than other types of flooring. Porcelain tiles take time and precision to install, as well as grout.
Click-lock vinyl planks can be laid down without the use of glue or adhesives, making them a popular flooring option for amateur home renovations.
.
Is waterproof vinyl flooring really waterproof?
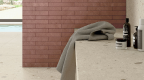
Our SPC vinyl planks are 100% waterproof. Their stone composite surfaces are fully impervious to water, and the click-lock edges stop water seepage in case of spills.
However, these tiles are not resistant to flooding, meaning water can get between locked tiles and damage the structures below.
In compliance with NZ government regulations, it is required that vinyl flooring be waterproofed for full protection in wet areas like bathrooms.
While vinyl flooring in New Zealand still requires additional waterproofing to protect the structure of the house, the planks themselves are suited to use in wet environments without damage.
Is vinyl cheaper than tile? Our SPC vinyl flooring comes at consistent pricing while tile prices vary widely.
.
How much does it cost to vinyl a bathroom?
Our luxury vinyl flooring costs between $60 and $90 per metre, making it great value for money. Many tools you need to lay vinyl flooring are everyday items usually available in the home, making for an easy installation method. These common household items include the following:
- Pencil
- Craft knife or scissors
- Chalk
- Measuring tape
.
How to lay vinyl flooring in bathroom areas
- First, waterproof the substrate. This can be done using the Wedi Waterproofing system. If you are renovating an existing bathroom, you will need to check that your waterproofing is still up to standard by a certified waterproof professional.
- Clean the floor base. The floor below must be completely free of moisture and dirt.
- Use a flooring plank to check that there is clearance under doors. The doors may have to be trimmed to allow for extra room. Be aware that luxury vinyl tiles are usually thicker than other vinyl types.
- Find the centre lines of the room by measuring each side and making centre points with chalk. Draw chalk lines intersecting the room through the centre.
- Line up the first vinyl planks with the centre of the room. Start from the centre and move outwards.
- Lock planks into place by applying them at an angle with the lower plank slightly wedged up. Simply slide the new tile into the desired position and move it down to lock it into place.
- When the flooring has reached the edges of the room, prepare to trim the excess from the edge planks. Do this by placing a plank against the wall, overlapping with the closest finished flooring. Use a pencil to mark the overlap and cut the plank along this line.
- Place the remaining plank in the space left between the flooring and the wall. Make sure the cut edge is against the wall.
.
Not needing adhesives removes the need to climate control the room and time for the flooring to cure. It also means you can move planks after placing them down in case of mistakes, unlike other vinyl products.
Our luxury vinyl flooring offers a classy, convenient, and cost-effective flooring solution for any bathroom.
.